Friday, July 25, 2014

Paul Cezanne lesson

(older class)
So what originally was going to be frescos with Da Vinci and Michelangelo changed to watercolor landscapes with Winslow Homer. But then I realized his style of American Realism was so similar to what we'd just studied the day before with Edward Hopper, that I had to make another switch, and ended up with Paul Cezanne. After all, according to Picasso and Matisse it all began with Cezanne, so why not end back at the beginning?


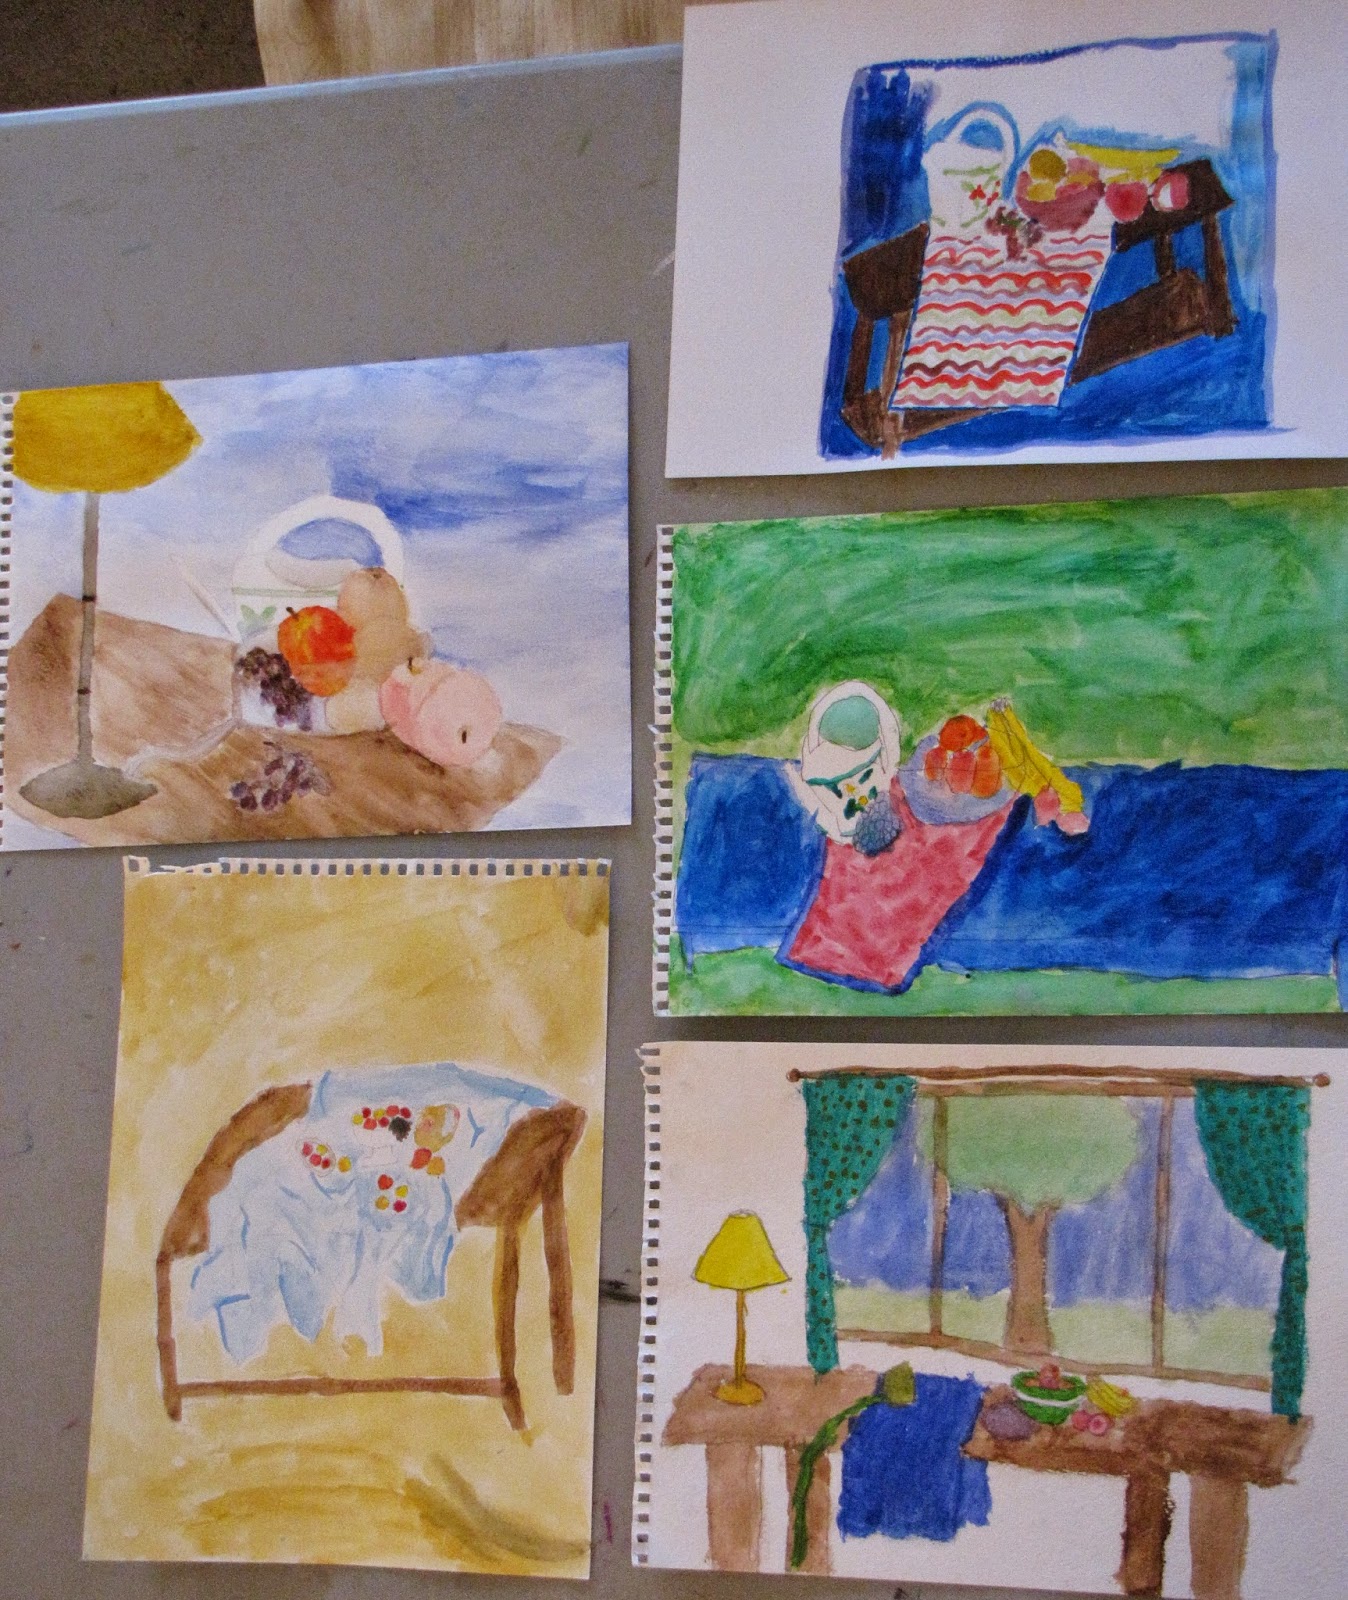
We started out reading a quick book on Cezanne's style that had great quotes from him such as, "I want to astonish Paris with an apple," and "...depict nature using cylinders, spheres, cones..." I love that first one. What a random ambition! After talking a bit about seeing shapes in everything and what shapes they are, we moved on to perspective. I had given everyone an empty tin can and I had them draw it quickly three times. Once from straight on, once from an angle looking into it, and once looking straight into it. We talked about how funny it is that the same can looks so different from three different angles and how your perspective changes how things are going to look, which is why Cezanne spent so long walking around his still lifes to really understand the apples and which perspective(s) he wanted to depict. In fact, Cezanne was the one who started painting from multiple perspectives at the same time so as to give a better understanding of the subject. The Cubists took that idea and ran with it for sure. Hence why Picasso found him so important! I demonstrated quickly on the board how to draw the table from a few different perspectives and told them in their paintings we wanted to be able to see the top of the table at an angle. What I needed to have done a better job emphasizing here was to make the table and apples fill up the page more. I did mention it but it is a hard concept for younger kids
 to hold onto. In the older class in the afternoon, I went so far as to say it had to be so big that it couldn't fit on the page.
Before we began I had them do a color spectrum moving from red to yellow with as many shades in between as possible. I challenged them to then include all those different shades in their painting, pointing out that each apple should have at least half a dozen different colors on it to make it look 3-D. The younger class had made their apples so small that they had a tougher time being able to do this, which is one of the reasons it's so important to get it big. Isn't it funny that no matter what size paper you give kids, they want to draw a tiny table right in the middle? Oh and before they began painting we watched this short slide show: https://www.youtube.com/watch?v=-KyJ4-Tr2NA&list=PLN8RnGwXw0RluGdfNNOGAZrcPeFjo5yzi&index=75 of Cezanne's still lifes, and I encouraged them to look for qualities in his work that they could try to use in their own. Turned out pretty nice, eh:
(younger class)


(older class)

Wednesday, July 23, 2014

Jackson pollock lesson

(students' work)
I can't believe I've never taught Jackson Pollock before! In fact, I can't believe I've never tried it myself. I suppose it just seems so intimidatingly messy. And it is. My driveway will never be the same.
But at least it was my driveway and not my carpets, right? Besides, what better way to advertise that an artist/art teacher lives here?! Are you convinced yet dear? My husband's so good to put up with me. Anyway, I finally got brave and gave it a go. I had bought massive rolls of paper, because if we're going to do this, were gonna do it right. Like the man himself and his enormous canvases. Kinda wish the plural of canvas was canvi, but I digress. With the older kids, we started out taking a survey. They ranked the importance of things like beauty or a political purpose or museum recognition in an artwork and we shared to get an idea of how peoples' ideas about art can be so different. We read "Action Jackson," and watched a short video of the artist working. I had everyone say at least one thing that they'd noticed about his style or techniques. They were pretty excited to get going. I gave them the option of collaborating on a huge sheet,
or of doing smaller ones on their own.
Darn North Dakota wind caused some problems, but overall it was a hit! And they turned out pretty impressive too! Oh and my bathroom looked like a color wheel had exploded in it. Make sure you have access to lots of soap and water if you give this a try. Probably should've been a given. Also, do your best to discourage intentional paint flinging at fellow students, while at the same time, not giving them any ideas. Ha!
(my daughter who now wants to do this every day)
(students' work)

Tuesday, July 22, 2014

Roy Lichtenstein lesson

(My daughters' projects)
I was really excited to give this new-to-me lesson a try! For whatever reason, I haven't ventured much into Pop Art in my teaching before. Roy Lichtenstein seemed like a great place to start. I had the book as a reference and to show examples, but we also watched a short YouTube video to familiarize ourselves with the artist and artwork. These were both appropriate for kids: Pop Artist Roy Lichtenstein and Diagram of an Artist. A rotating easel?!??! I want one! We discussed the characteristics of his work (primary colors with white and black bold outlines, dots, strong lines, comic/advertisement inspiration), and the why behind his recognizable style. Then we got to work!
I took a photo of them (taken the previous day so we wouldn't waste time) and encouraged them to make a face that expressed some emotion that could inspire a good word bubble later on.
After I'd printed the photo, they outlined the essential parts with a black pen. I pointed out that Lichtenstein kept things simple, leaving out unnecessary details. The younger class needed some help with some of their harder facial features, and I encouraged the older class to take their time.
(My example done of my son)
We then put a piece of tracing paper on top and traced the lines they felt worked. My younger class in particular was blown away that they'd turned themselves into look-alike cartoons. They also found it to be totally hilarious. Wasn't our quietest day but they were loving it! I ran their finished tracing paper drawings over to the copier and copied it onto white card stock. Then they got to paint. My 3 year-old even did a pretty good job, don't you think?
I had them do dots for all skin, with the option of dots, stripes, or solids for everything else. I pointed out that if their hair was red, the skin shouldn't be red as well. I provided Q-tips for the younger class, but showed the older ones that they could use the wrong ends of the smaller paintbrushes to make even smaller dots. I think they turned out great!
Oh, and I sent each of the students home with a comic strip and challenged them to, as an extra assignment, recreate one of the frames. Like Roy Lichtenstein would do, I encouraged them to simplify and focus on the essential details that would allow it to stand on it's own as a "work-of-art" instead of a "common" comic. I'm excited to see what they come up with!

Monday, July 21, 2014

Franz Marc lesson

Today we had a blast doing a lesson on one of my favorite artists, Franz Marc. We had a quick biographical intro and then I read, "The Artist Who Painted A Blue Horse" by Eric Carle. I asked why he would have chosen to paint the animals the "wrong" colors. We brainstormed a number of possible reasons why they would maybe choose to paint that way, but then discussed further his desire to express emotions through colors and lines. We looked at a number of his works to see the different ways he used color and lines and then made a list of what feelings different colors could or usually do stand for. Here's my messy chalkboard of notes: 
Then I had them pick a favorite animal and draw it lightly onto watercolor paper, reminding them repeatedly to fill up most of the page with their animal so it's the focus. They were to add simple background elements to fill the space and add interest, but not distract from the main event. When they were happy with their drawing, they traced the lines with a black crayon, pushing hard and trying to make some variety of thickness. Again for interest. I did a quick demo of "wet into wet" and had them then paint their animals in a color that best represented them. Being art camp where we highlight a different artist every day, we only had one class to complete it. If we'd had more time, I would've spent more time talking about mixing colors and blending to show volume and depth. But as it was, I think most of them ended up pretty happy with their work. I sent them home with an "extra work" sheet that asked which group Marc was part of, how they'd describe his paintings and what they liked/disliked about them. I look forward to reading their answers tomorrow and moving on to Roy Lichtenstein!


Tuesday, April 15, 2014

2014 SUMMER ART CAMPS

I had so much fun teaching art camps last summer, that I just had to do it again! In case you're curious, I'll explain how I run my classes. I keep them small - around 10 kids. Class is held at my house, although sometimes we are inside,and sometimes we're outside, depending on the activity and the weather. We usually start out by getting to know a famous artist, like Jackson Pollock. We'll touch on bio information like where and how long he lived, family background, other occupations or interests, etc. Then we discuss what kind of art he created and look at as many examples as we can. Sometimes I'll read a kids book like Action Jackson to cover this information, sometimes we view powerpoint presentations or short videos, sometimes we just talk. We often do a short activity to learn more about the art and compare it to his or her contemporary artists and/or artists we've already studied. It's more fun than it sounds, I promise! And you'd be surprised how quickly kids can become interested in art history and art appreciation. I just wish we had a bunch of museums nearby for them to see the real stuff, but this'll have to do in the meantime! Then, the real fun begins and we get to get our hands dirty. Literally. I always have a project planned that allows them to use the same techniques or methods as our artist of the day, or focuses on his or her subject matter of choice. Or sometimes we pick a particular artwork of his and change it to make it our own. For example, on the day we are going to study Grant Wood, we're going to look at his American Gothic painting. The students will copy the background, but draw their own parents in the place of the famous farmers. Or on the day we study Da Vinci and Michelangelo, we'll create small frescos (like The Last Judgment or The Last Supper), by pouring plaster into pie pans and painting a story on it before it's dry so the paint sinks in. Gotta work fast on that one! I always have the goal of making the project that we do be fun and memorable in a way that lets them explore their own creativity and skill while helping them remember what they've learned. Those are some of the specifics. Here's the overview of the classes being offered:

Session I: DRAWING
June 9th – 13th
Learn various drawing techniques while creating artworks in chalk, colored pencil, oil pastel, and markers inspired by M.C. Escher, Grandma Moses, Grant Wood, Gustav Klimt, and Keith Haring.
Ages 5 – 9: 10 – 11 AM       $50
Ages 10 – 18: 1 – 3 PM       $85

Session II: PAINTING
July 21st – 25th
Using watercolor and tempera paints, experiment with different skills as you paint like Leonardo Da Vinci, Franz Marc, Jackson Pollock, Edward Hopper, and Roy Lichtenstein.
Ages 5 – 9: 10 – 11 AM       $50
Ages 10 – 18: 1 – 3 PM       $85

Session III: MIXED MEDIA/METHODS
August 4th – 8th
Enjoy expressing creativity like Andy Warhol, Faith Ringgold, Henri Rousseau, Andy Goldsworthy, and David Hockney while trying your hand at printmaking, textile art, collage, environmental art, and photomontage.
Ages 5 – 9: 10 – 11 AM       $50
Ages 10 – 18: 1 – 3 PM       $85

If you have more questions, feel free to ask! Leave a comment or shoot me an email. And since I keep class sizes small, be sure to reserve your spot soon! They're filling up fast!

Thursday, April 3, 2014

Student Work

This last fall I taught two 16-week art classes for homeschooled students. It was so much fun and was a great learning experience for me and for my kids! We studied a different famous artist every week and created original artworks inspired by their styles, techniques, or intentions. Here's some of their awesome examples.

Matisse's Goldfish:
 Cezanne Still Lifes:
 Wassily Kandinsky copies:
 Picasso-like flowers and hands:
 Georges Braque and Cubist guitars:
 
Like Piet Mondrian: